MrMakeIt
A Ship of Theseus in 3D Printing
The Origin Story
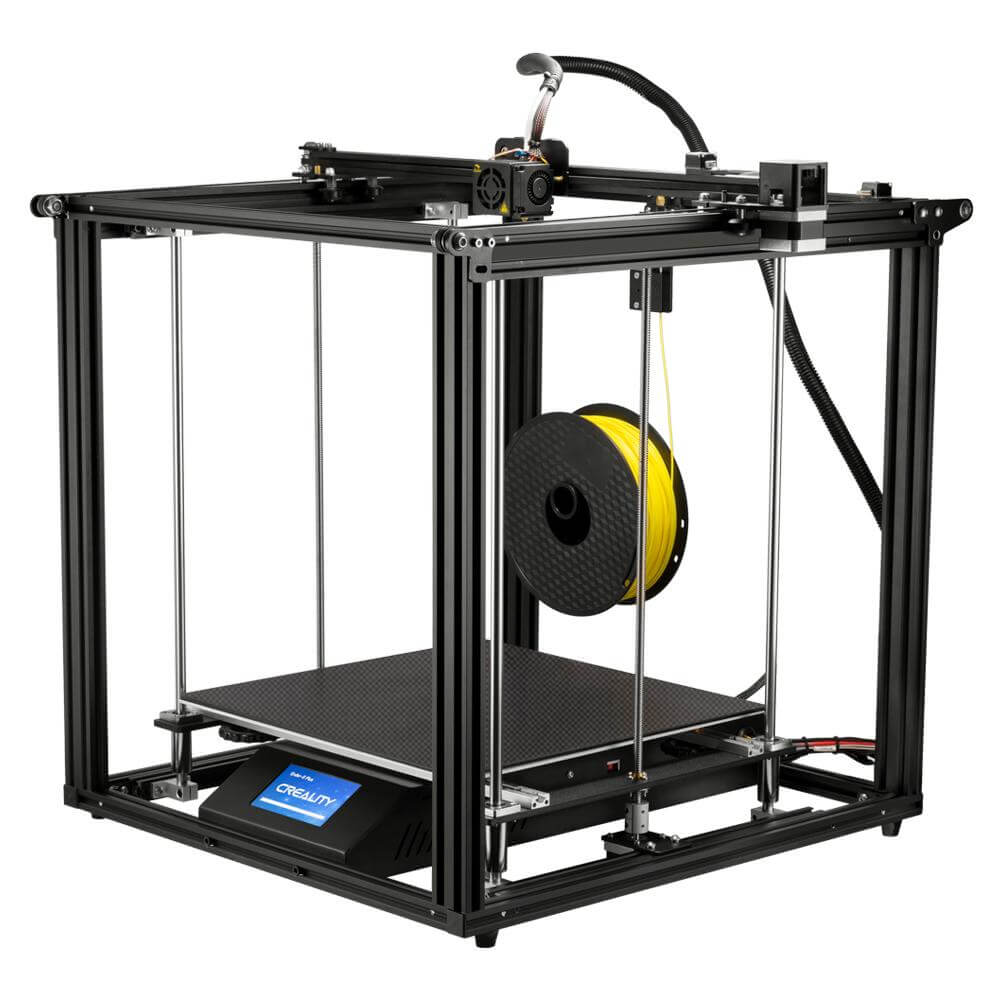
MrMakeIt began life as a Creality Ender 5 Plus, an entry-level 3D printer chosen for its generous 350x350x400mm build volume. But like the Ship of Theseus, the ancient thought experiment that asks whether a ship is still the same ship after every plank has been replaced, MrMakeIt has been transformed bit by bit into my ideal 3D printer. Today, the only original parts remaining are the power entry module and the power supply (and perhaps a few stray screws). Everything else has been replaced in pursuit of higher performance, and in my attic sits a box with all the pieces needed to build an Ender 5 Plus.

The Evolution
The Stock Printer and Early Modifications
I was very happy with my Ender 5 Plus in the beginning. The print quality was good, and I didn't have any complaints. I noticed on Reddit that other people with the same printer would make modifications just for the sake of modifying without any clear goals. I didn't have much interest in modding for the sake of modding, but I did start to see some deficiencies that I wanted to address.
The first mods I made were to address what I felt was insufficient wire/cable management. I ended up designing my own cable management system that used drag chains.
Then I wanted to be able to monitor and control my printer when I wasn't in the room, so I installed OctoPrint on a Raspberry Pi and mounted an old Android phone to the printer to use as a camera.
I started to realize that the imprecise filament retractions over such a long Bowden tube were causing print quality issues, so I modded the printer to be direct drive by mounting the extruder motor to the toolhead.
The next modification I made was to the firmware. I heard so much talk about new firmware called Klipper, and eventually I had to try it out for myself. This was really a game changer. The amount of control and ability to tune my printer on the fly took things to the next level.
After installing Klipper, it became clear that the lack of cooling was the main factor preventing me from printing even faster, so I added some 5015 blower fans using a toolhead design called Hero Me.
The Hero Me system had so much flexibility that it made it easy for me to address two more weaknesses: I replaced the huge stock extruder motor with a geared extruder and lightweight stepper (the Orbiter 2), and I replaced the stock hotend with a Rapido. At this point, the main limitations were based on the motion system, which led me to Phase 2.
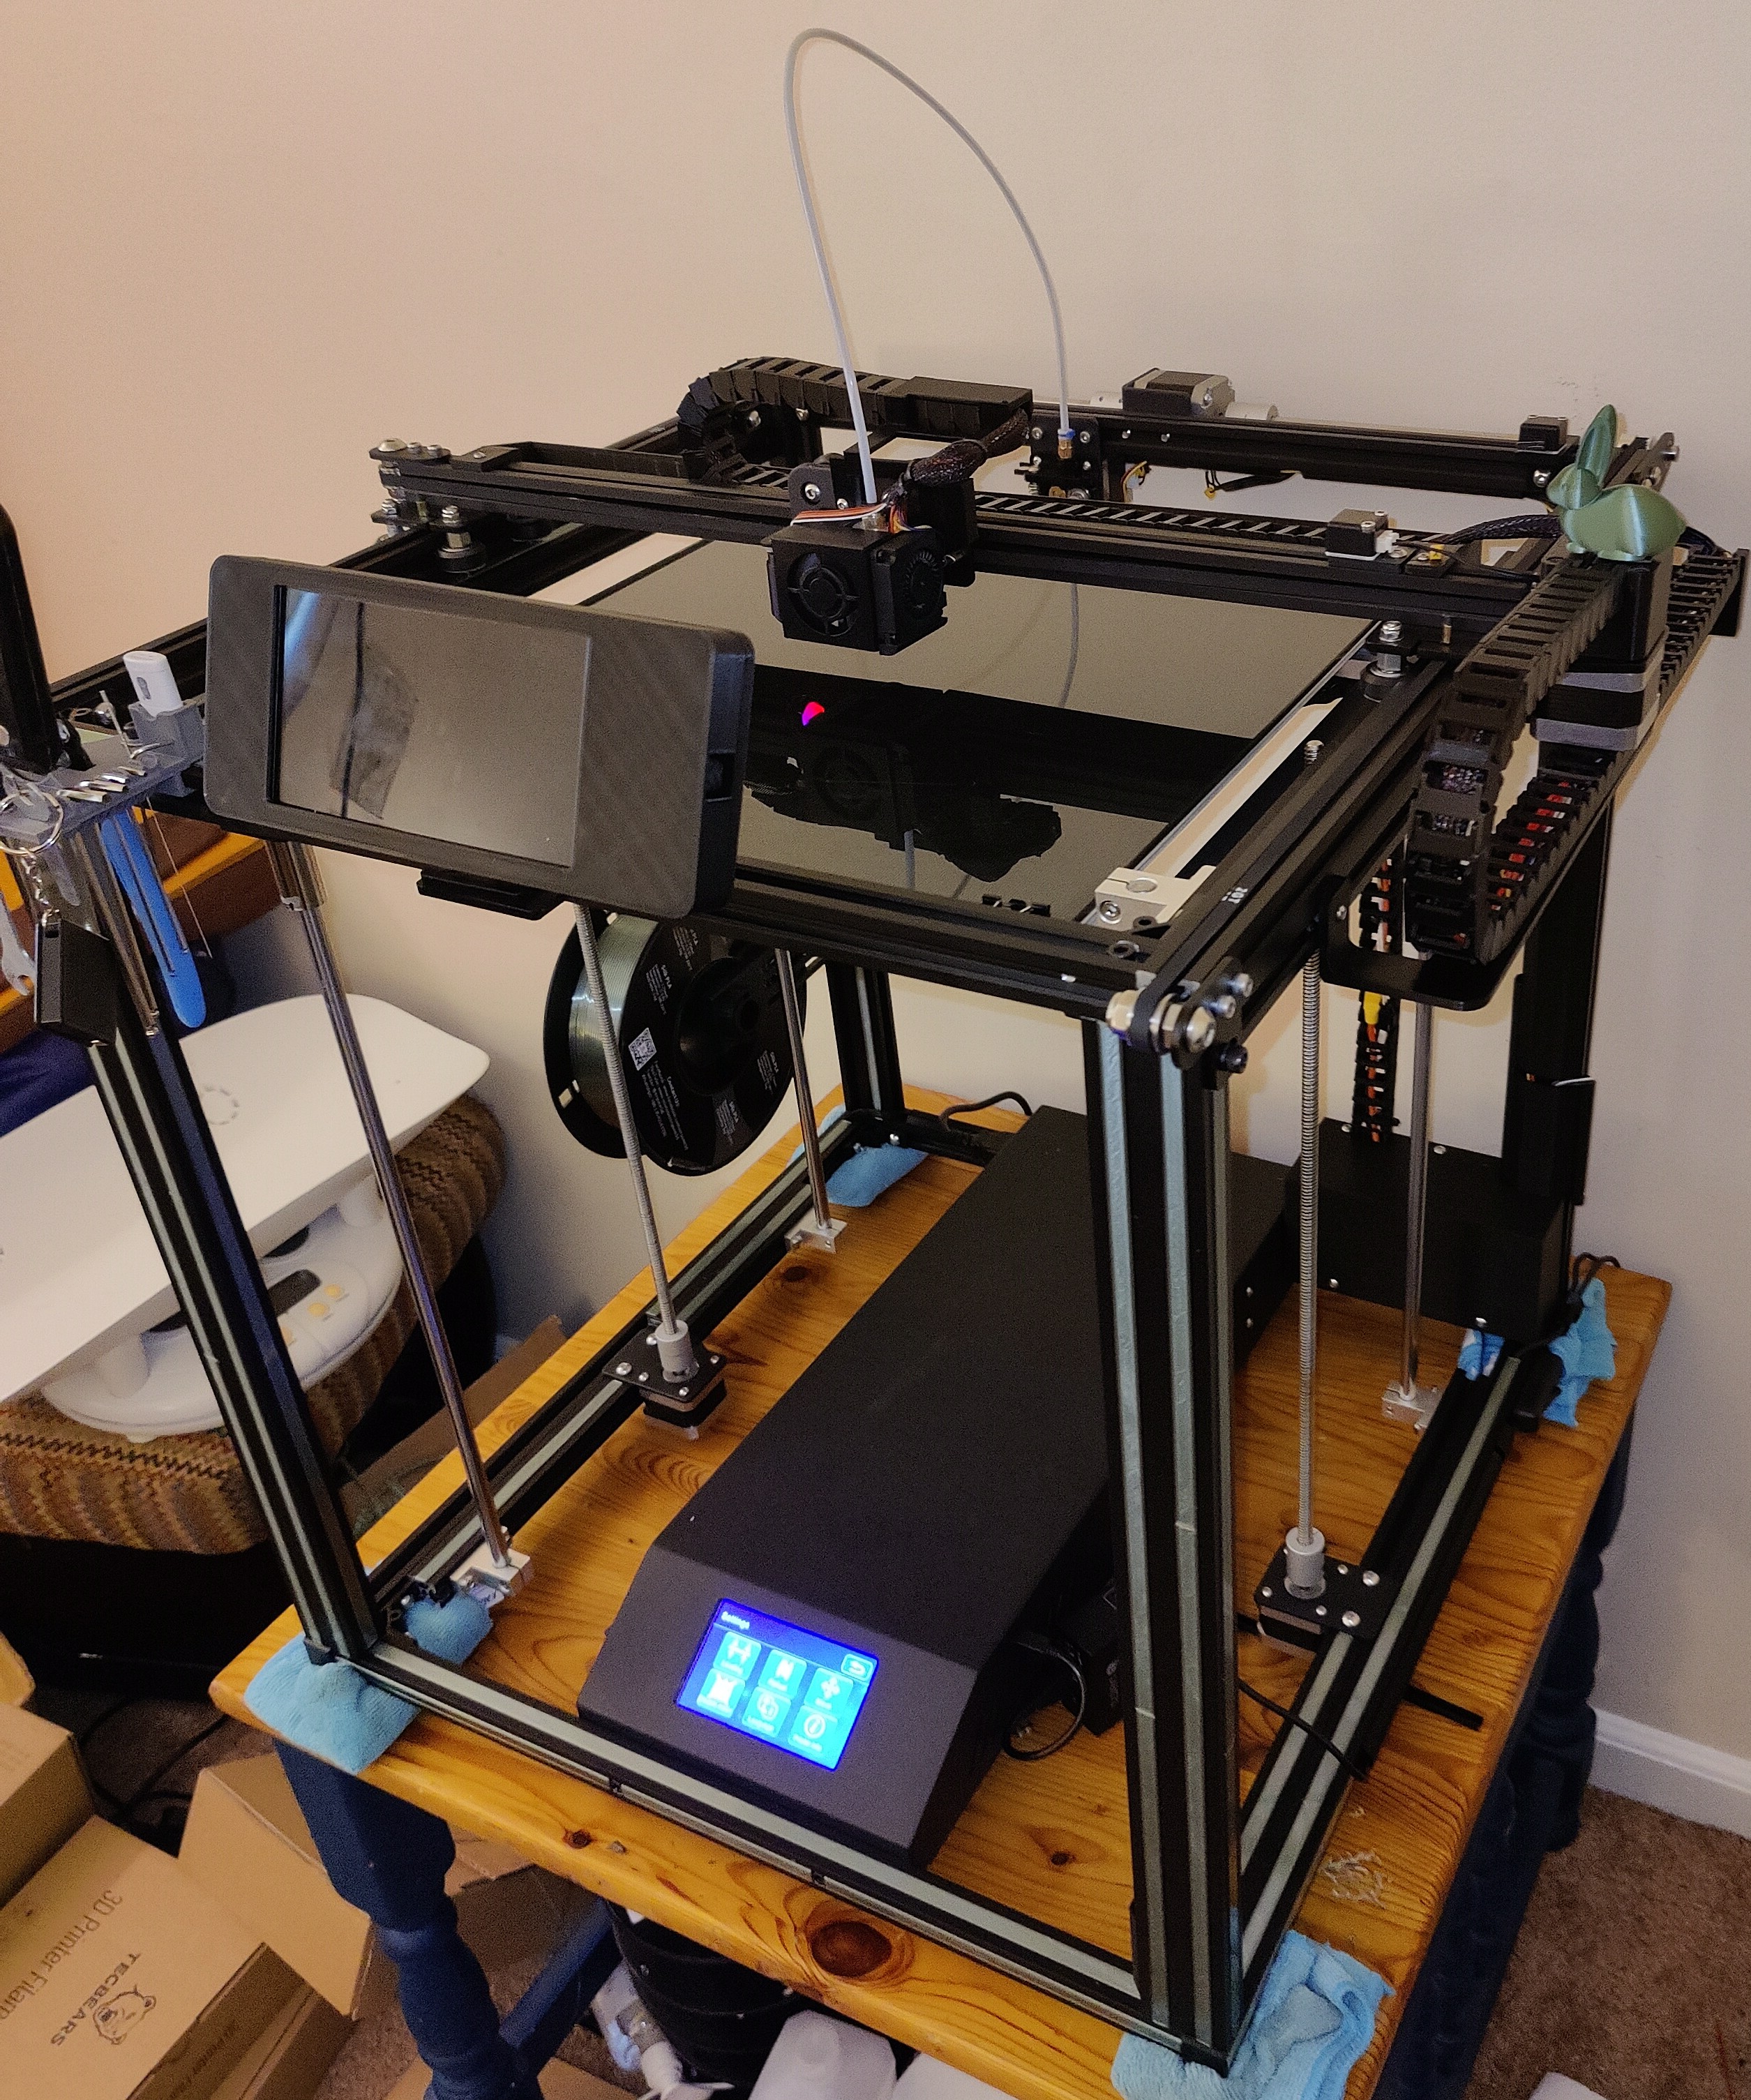
The Motion System (Mercury One)
The stock Ender 5 Plus used "V-rollers" (rubber wheels riding on aluminum extrusions) for motion. Over time, these wheels wear down, developing flat spots that introduce artifacts into prints. Eventually, the limitations of moving heavy masses on rubber wheels necessitated a total redesign. Fortunately, this problem had already been solved with the ZeroG Mercury One CoreXY conversion for the Ender 5 / Ender 5 Plus.
In a standard printer, one motor moves X and another moves Y. In CoreXY kinematics, two stationary motors work in unison to move the toolhead. This also removed a stepper motor from the X-axis extrusion, significantly reducing the moving mass and allowing for much higher acceleration. By converting to this system and replacing the V-rollers with precision MGN12H linear rails, the printer gained the mechanical rigidity required for high-speed printing.
The Mercury One used a version of the Eva 2.4 toolhead that I found to be much better than the Hero Me, and I'm still using it today.
When I converted to the Mercury One, I ditched the cable chains and moved to a dedicated toolhead board. A BTT EBBCan communicating over CAN bus was eventually replaced by an Orbitool O2, a compact MCU that integrates the extruder driver, fan control, probe input, accelerometer, and RGB LED into a single board. The old system had serpate wires running to the toolhead for each of these components. With a toolhead board, I could power and control everything on the toolhead with only four wires.
The Hydra Bed System
The original bed of the Ender 5 Plus was much too thin for its size. Large aluminum beds suffer from a specific physics problem: when heated, they expand. If the bed is bolted down at four corners (like the stock printer), this expansion has nowhere to go, forcing the plate to bow upwards into a "taco" shape.
The ZeroG Hydra system solves this by mounting a much thicker and flatter MIC6 aluminum bed on three independent Z-axis motors using kinematic mounts. This allows the bed to expand radially without warping, ensuring a perfectly flat surface regardless of temperature.
The use of three separate Z motors allowed me to automatically level the bed without having to mess with the adjustment wheels that came with the original printer. The original controller didn't have enough stepper drivers for the additional Z motors, so it was replaced with a BTT Octopus Pro controller.
The new bed also uses a much more powerful 120V AC heater.
This modification also involved a complete redesign of the electronics enclosure, which was desperately needed at this point.
The Enclosure
To print engineering materials like ABS and ASA, the print environment must be controlled. I reconstructed the entire frame with new extrusions to square the machine and added a full enclosure.
This upgrade included a Nevermore activated carbon filtration system, which recirculates chamber air to scrub Volatile Organic Compounds (VOCs) rather than just venting them.
This also solved another fundamental weakness of the original printer; its frame was far from rigid or square. The original extrusions that made the frame of the Ender 5 Plus were almost the last remaining part of the original printer.
Replacing the frame was the moment when I really began to question if it was really the same printer anymore. I still referred to it by the same name (MrMakeIt), but almost none of the original material was still in use. If I assembled the box of parts I removed back into an Ender 5 Plus, which of the two printers would be MrMakeIt?
Deep Dive: System Architecture
The Evolution section tells the story of what changed and why. This section is about how: the engineering decisions that make MrMakeIt work the way it does today.
Thermal Equilibrium Strategy
Heating a large, 8mm thick MIC6 aluminum plate introduces significant thermal lag; the heater pad may read 100°C while the print surface is only 85°C. I solved this problem by implementing a Temperature Combined Sensor algorithm.
- Dual Sensing: The firmware averages readings from the silicone heater pad and a secondary thermistor bolted directly to the aluminum plate.
- Equilibrium Logic: The
START_PRINTmacro prevents operation until the external sensor specifically reaches the target window. This guarantees the entire thermal mass is heat-soaked before the first layer begins, eliminating warping caused by thermal expansion during the print.
Closed-Loop Electronics Cooling
Driving the heavy gantry requires running the TMC2209 stepper drivers at a high 1.4A RMS current. At that current, thermal management isn't optional. Overheated drivers cause layer shifts, and I learned that the hard way on a 14-hour print. To prevent it, I implemented an active PID cooling loop.
- PID Control: A dedicated fan monitors the temperature of the stepper drivers and adjusts speed dynamically to maintain a target of 45°C.
- Efficiency: Unlike static fans that run at 100% noise levels, this system only applies as much cooling as necessary, keeping the machine whisper-quiet during low-load operation and ramping up solely during high-speed moves.
Next-Generation Topography Mapping
A flat first layer is critical. MrMakeIt employs z_tilt_ng (Next Generation), an advanced leveling algorithm available in the Kalico firmware fork.
- 0.003mm Tolerance: The probe repeatedly measures three points on the bed, adjusting the three independent Z-motors until they are aligned within 3 microns of each other.
- High-Density Mesh: The machine stores a 21x21 point topological map (441 total measurement points) to compensate for even the slightest surface deviations across the 350mm build plate. Most printers probe and generate this mesh at the start of every print, but I found that the topography of the bed was consistent for any given temperature, so I don't bother probing at the start of each print. I simply load the mesh that is appropriate for the temperature that I am printing at. It has been almost two years since I generated a bed mesh, and the first layers still come out great.
Visablity and Operational Awareness
A Neopixel RGBW LED is mounted under the toolhead, shining bright white light directly onto the area being printed. Beyond illumination, it doubles as a status indicator.
- Status Effects: Distinct color patterns indicate idle, homing, bed heating, printing, paused, and finished states, making it possible to check on a print from across the room.
- Enclosure Illumination: PWM-controlled LED strip provides broad lighting across the full build area. The lights are controlled by the printer firmware and stay on when printing, but they are also integrated into my home automation system and go on and off with the other lighs in the room when nothing is printing.
Remote Monitoring
A Raspberry Pi 4 serves as MrMakeIt's brain, running the Kalico firmware host, web interfaces, and camera stack.
- Camera Streaming: A camera feeds through Crowsnest using WebRTC for low-latency viewing, with MJPEG and RTSP fallbacks for broader client support.
- Mobile Monitoring: OctoApp provides push notifications and remote access, enabling me to monitor and control the printer when I am not in the same room.
Automated Configuration Backups
With dozens of tuning parameters across kinematics, thermal management, and macros, a loss of the configuration due to a corrupted SD card would be detrimental.
- Auto-Backup: A filewatch service monitors the configuration directory and automatically commits changes to a private GitHub repository, ensuring every adjustment is versioned and recoverable, with no manual snapshots required.
Advanced Firmware Features
The printer runs Kalico (formerly DangerKlipper), a bleeding-edge fork of Klipper that enables many additional features, and give me a level con control that is not avialible in regular Klipper. Thier motto is "If I want my printer to light itself on fire, I should be able to make my printer light itself on fire."
- Tanh Pressure Advance: Instead of standard linear pressure advance, MrMakeIt uses a hyperbolic tangent (tanh) model to predict filament flow behavior during acceleration, resulting in sharper corners at high speeds.
- Object Exclusion: The firmware can dynamically cancel specific objects within a failed batch without stopping the entire print.
- Smart Motion Sensor: A filament motion sensor (detecting 4mm of movement) pauses the print instantly if a clog or tangle occurs, saving long prints that would otherwise fail due to extrusion loss.
Input Shaping
At high speeds, the gantry's momentum creates vibrations that appear in prints as visible "ringing" artifacts. MrMakeIt solves this with an LIS2DW accelerometer mounted on the toolhead.
- Resonance Mapping: The accelerometer measures the printer's natural resonance frequencies by shaking the toolhead across a sweep of speeds.
- Active Compensation: The firmware applies Smooth MZV input shapers tuned to the measured frequencies (52.8 Hz on X, 37.2 Hz on Y), preemptively adjusting motor commands to cancel vibrations before they reach the nozzle.
The Philosophy
MrMakeIt embodies the spirit of the maker community: the belief that our tools should evolve alongside our skills. What started as an entry-level appliance is now a high-performance engineering platform, with capabilities that I couldn't have imagined when I first got my Ender 5 Plus.
So, if you replace every part of a ship, is it still the same ship? Somewhere in my attic, there's a box that contains every original part I've removed, enough to build a complete Ender 5 Plus. If I assembled it, which of the two printers would be MrMakeIt? The one built from the original atoms, or the one that grew through every late night spent tuning, troubleshooting, and rebuilding?
For me, the answer is clear. MrMakeIt isn't defined by its parts. It's defined by the continuity of the project: a platform for learning, breaking, fixing, and perfecting. In that sense, it has always been the same printer. It just happens to be made of entirely different atoms than when it started.